Added 1 new A* page:My Pilot Parallel Calligraphy Pen came today! These are inexpensive light plastic pens with tapering, hollow barrels and a unique nib consisting of two flat metal plates laying one on top of the other; ink flows between the plates, and you can use their edges to make wide lines--or narrow, if you use the eh side edge. As the name implies, these pens are mostly intended for calligraphy, but I since I've taken a shine to PITT Calligraphy markers lately, I thought I'd the PPP a try to see if it could be useful for A*. (Incidentally, the name is written "Para//el" on the packaging.)
Here it is--I got the 6 mm-wide nib model--broken down into its pieces! It disassembles quite easily for cleaning--it even comes with a little pump you insert where the ink cartridge would usually go, that lets you flush old ink of the feed very easily--and then snaps right back together:
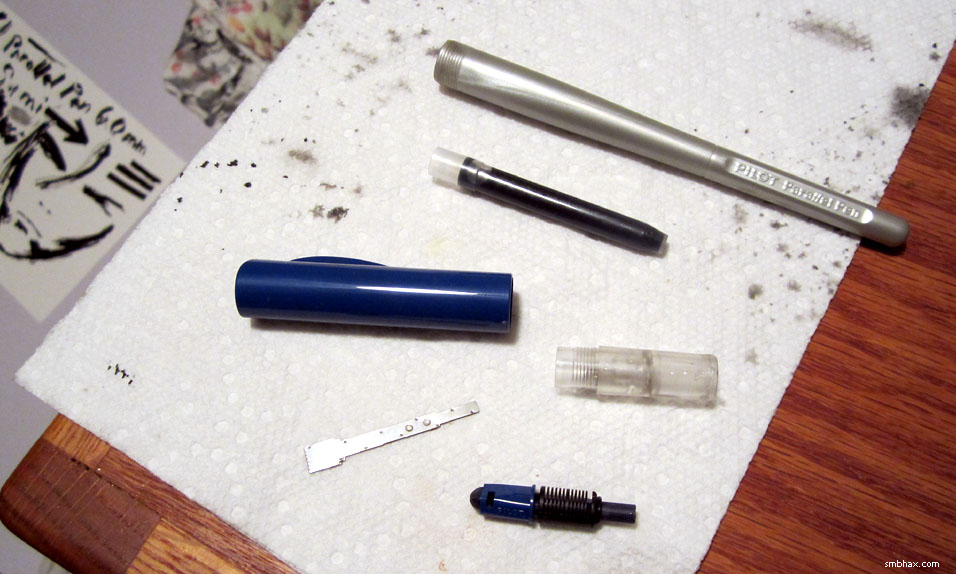
I wasn't gonna use the included cartridge of non-waterproof ink, though! 'Cause I saw on the internet, like here, several people talking about successfully using the PPP with other inks, simply by leaving out the cartridge and instead filling the whole barrel, which is hollow and seemingly airtight, with the ink of their choice.
So I filled mine with the waterproof sumi ink I use for A*! It's a much thicker ink than the stuff the pen comes with, and I had to shake it upside-down for a minute or so to get the ink to work its way through the feed to the nib (did this with the screw-cap on just in case the ink decided to start jetting out), but then it did indeed start flowing when the nib was pressed onto the paper. Here's the rather massacred test sheet I made with the pen:
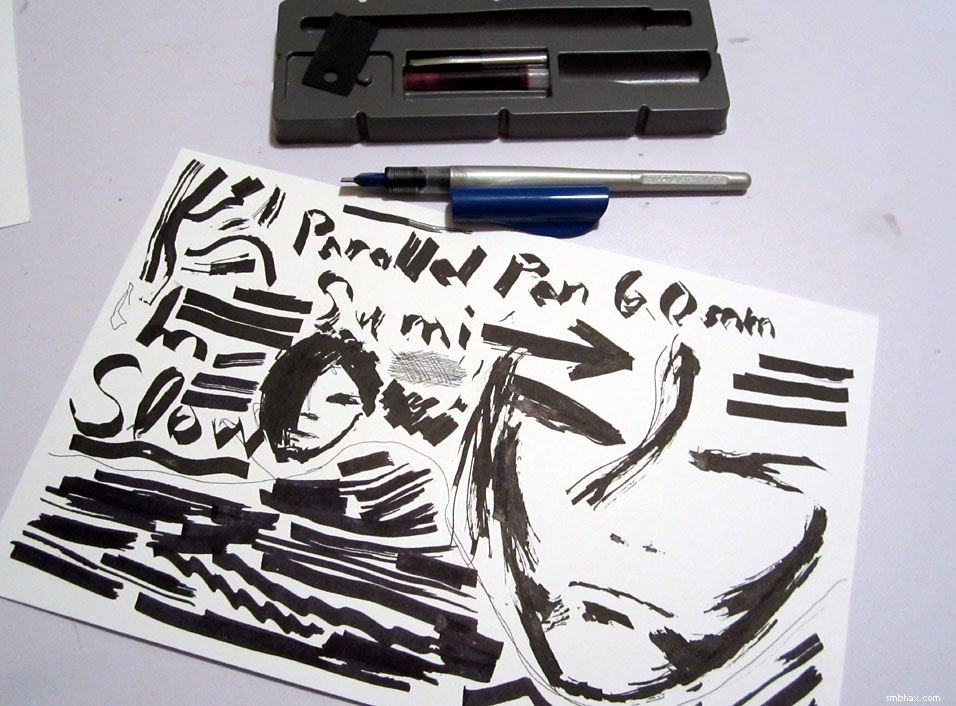
Eesh! Well, I found that, especially with the thicker sumi ink, the ink wouldn't quite come out smooth and even unless I was very careful to go slowly and keep the nib's leading edge very flat against the paper. I've never really done calligraphy, and I imagine that's a basic skill for that discipline, but it's one that I haven't developed and...well, am too impatient to really try bothering with. ;) So the output was pretty spotty.
I cleaned the pen thoroughly and tried it at the bottom of the page with the included ink cartridge, and--after a bit of additional flossing using the included plastic sheet that extracts paper fibers and such from between the plates of the nib--found that it was a little easier to make solid lines with, thanks to its more fluid nature, but even with it I could still get spotty lines quite easily if I moved the pen too quickly, or didn't keep pressure applied very evenly across its leading edge. Admittedly this is due in large part to my lack of training and patience, as some people can produce nice unbroken lines when drawing with it.
I suspect that the narrower nibs--there are three, going as small as 1.5 mm across--probably flow a little more readily and are easier to keep even on the page. I'm not going to bother trying one, though, because I found the nib also chews into the surface of the paper something fierce, especially when you're going over a spot that's already had some ink on it, which I do constantly while drawing. In fact in the above photo you can see some of the chewed-up parts, because their broken surface reflects less light so they look darker: look for the dark patches in the middle of the cheekbone shadows, and in the middle of the black bang of the smaller head--those areas are torn up a bit. Drawing with the corners of the nib for a thin line is at least as rough on the paper as a standard metal drawing nib, but even drawing with the flat edge will start to gouge the paper, because instead of the edge being perfectly smooth, it consists of a series of small square teeth.
So! The Parallel Pen is an interesting tool, very affordable to mess around with, and surprisingly flexible in terms of what ink it can use--but it doesn't really suit my drawing style.
~~~~~
Here are a few early stages of drawing for today's page--I'm still on my no pencil / straight to ink kick, and I've found that you don't even really have to worry much about getting all the details right on the first go: just get the basic layout, poses and proportions down, and then come back in later with black fill or white ink and work in the details; for instance, here you can see that the profile of the face isn't really there yet, and the shoulders are too wide--and heck, the bottle isn't even very straight:
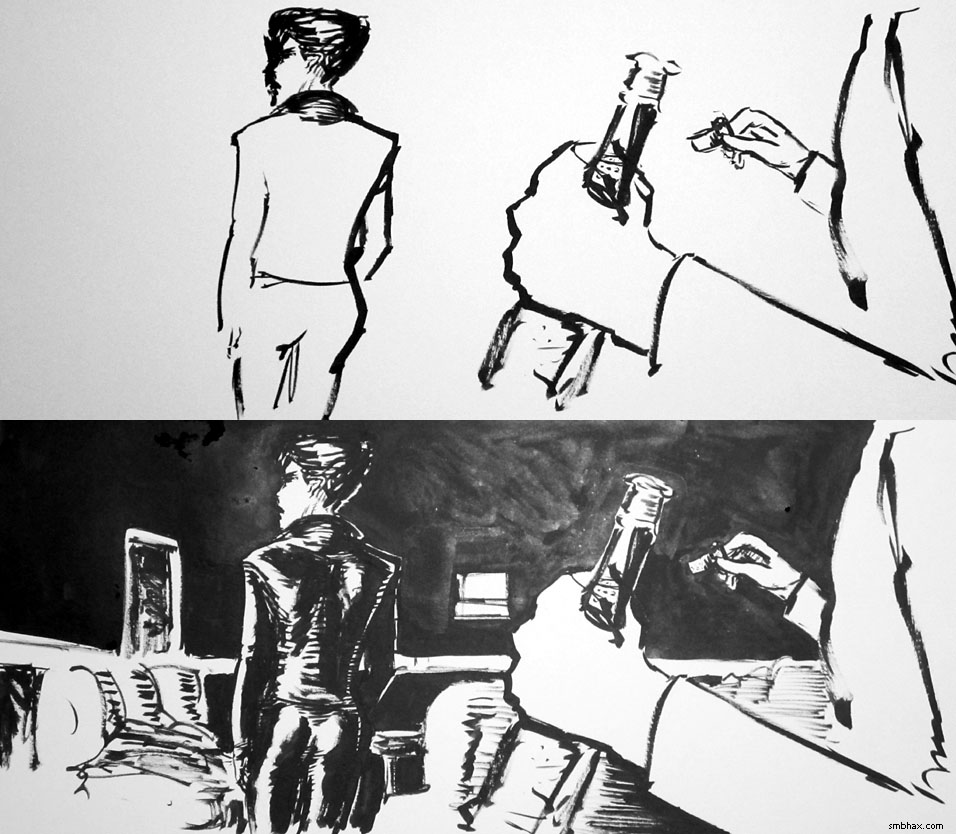
But it would be okay eventually. Yay for white ink! =)
|